 In-Stock Music Orders Over $99 SHIP FREE Within The Continental U.S.


 Login
Login
 My Account
 Cart
Cart Wishlist
 Contact


Found 276 product(s) from labels matching "
classic records
"
|
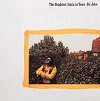
Dr. John / The Brightest Smile In TownDVD 24/96CDAD 1017 Original Price: $30.00 $2.00 |

|
Terry Evans / Blues For ThoughtDVD 24/96CDAD 1014 Original Price: $30.00 $2.00 |
|
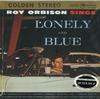
Roy Orbison / Sings Lonely And BluePreowned Vinyl Record2002 200g pressing sealed Maine Collection UMON 14002QS $125.00 |
|
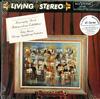
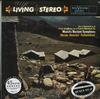
Fritz Reiner: Chicago Symphony / Moussorgsky-Ravel: Pictures At An ExhibitionPreowned Vinyl Recordsealed 4 x 45rpm 180g Canada Collection ULSC 2201-45S $225.00 |

|
Billie Holiday / Songs For Distingue LoversPreowned Vinyl Recordsealed 2 x 45rpm 180g Oregon Collection UVEC 6021-45S $125.00 |

|
Paul Paray/Detroit Symphony Orchestra / Chabrier: Espana, Danse Slave etc.Preowned Vinyl Record4LP Set/ 45 RPM/ 180 Gram UMER 90212-45 $150.00 |
|
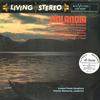
Mackerras, London Proms Symphony Orchestra / FinlandiaPreowned Vinyl Record45rpm / Single Sided Pressing Oregon Collection ULSC 2336-45 $125.00 |
|
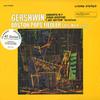
Wild, Fiedler, Boston Pops / Gershwin: Concerto in FPreowned Vinyl Record4 LPs 45 rpm Oregon Collection ULSC 2586-45 $140.00 |
|
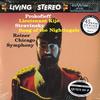
Reiner , Chicago Symphony Orchestra / Prokofiev: Lieutenant Kije etc.Preowned Vinyl RecordSealed/ 4LP/ 45RPM/ 200Gr. ULSC 2150-45S $195.00 |
|
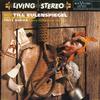
Fritz Reiner, Vienna Phil Orchestra / Strauss: Till Eulenspiegel etc.Preowned Vinyl Record180gr Canada Collection ULSC 2077 $50.00 |
|
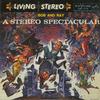
Bob and Ray / Throw a Stereo SpectacularPreowned Vinyl RecordClassic Records / 180g / TAS ULSP 1773 $150.00 |
|
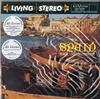
Reiner, Chicago Symphony Orchestra / SpainPreowned Vinyl Record4LP / 45 rpm / 180gr / sealed Canada Collection ULSC 2230-45S $250.00 |
|
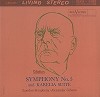
Gibson, LSO / Sibelius: Symphony No.5 etc.Preowned Vinyl Record180gr/ Canada Collection ULSC 2405 $40.00 |

|
Antal Dorati/London Symphony Orchestra / Prokofiev: Love For Three Oranges Suite etc.Preowned Vinyl Record180g Canada Collection UMER 90006 $125.00 |
|
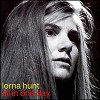
Lorna Hunt / All In One DayDVD 24/96CDAD 1015 Original Price: $30.00 $2.00 |
|
Gibson, Royal Opera House Orchestra, Covent Garden / Gounod: Faust etc.Preowned Vinyl Record180gr/ Canada Collection/ 45rpm/ 4LP/ Sealed Oregon Collection ULSC 2449-45S $750.00 |

|
Sonny Stitt / Blows The BluesPreowned Vinyl Record4 LPs 45 rpm Oregon Collection UVEC 6149-45S $225.00 |

|
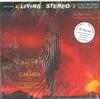
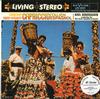
Fennell, Eastman-Rochester Pops Orchestra / Hi-Fi a la EspanolaPreowned Vinyl Record180g Oregon Collection UMER 90144_1 $200.00 |
|
Henriot-Schweitzer, Munch, Boston Symphony Orchestra / Ravel: Concerto in G--d'Indy: Symphony on a French Mountain AirPreowned Vinyl Record4 LP Sealed ULSC 2271-45S $85.00 |
|
|
Refine Your Search
-
 By Category
 Vinyl (268)
DVD (8)
-
By Availability
Limited Stock (268)
Limited Stock (4)
In Stock (3)
Back Ordered (1)
-
By Label
Classic Records (RCA Living Stereo) (101)
Classic Records (Everest) (41)
Classic Records (Mercury Living Presence) (19)
Classic Records (Verve) (13)
Classic Records (Vanguard) (13)
Classic Records (Monument) (10)
Classic Records (Rock The House) (10)
Classic Records (RCA Victrola) (9)
Classic Records (8)
Classic Records (Blue Note) (7)
[show all] -
By Genre
Classical (187)
Pop/Rock (43)
Jazz (28)
Soundtrack (7)
Blues (2)
Female Vocalists (2)
Hip Hop / Rap (2)
Country (1)
Male Vocalist (1)
Folk (1)
[show all]
Change how search results are displayed
|
|


We Accept

© 2024 Acoustic Sounds, Inc. All rights reserved.
Prices and availability are subject to change without notice.
Read our Privacy Policy
Prices and availability are subject to change without notice.
Read our Privacy Policy